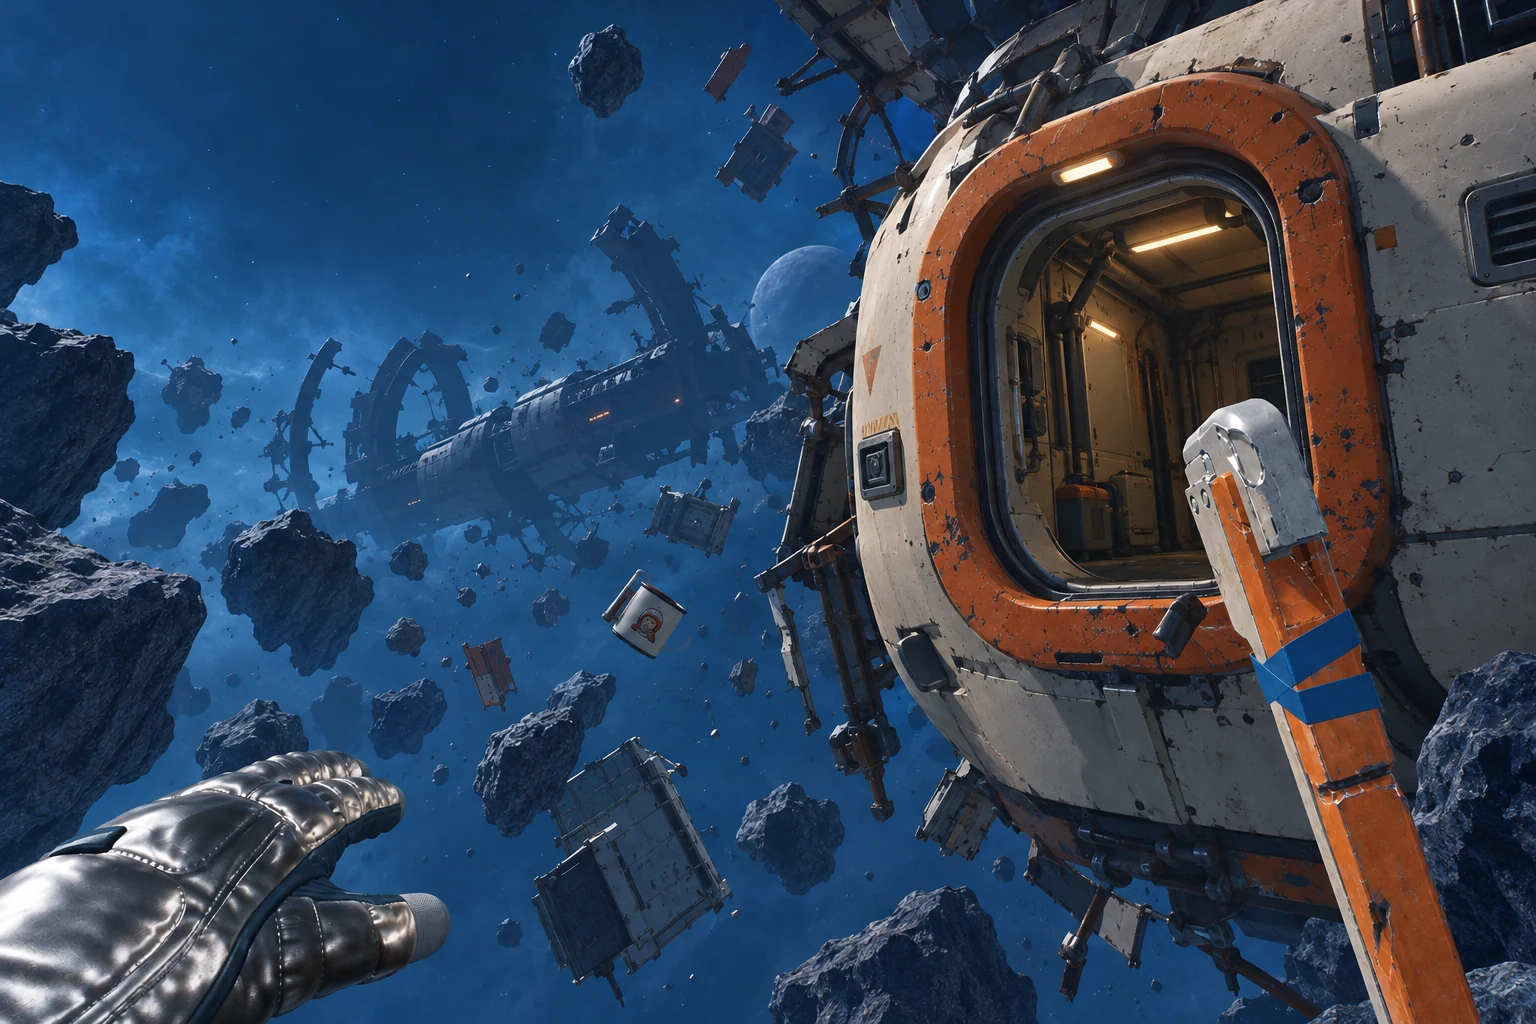
Record the mode you actually choose. Keep Impossible or timed replay targets separate from your preferred equipment and exploration style.
These controls record your game and guide preferences. Change actual game settings in the game.
What should your expeditions prioritize?
Choose how much attention to give the campaign, oxygen-safe exploration, construction and optional replay goals. These are equipment priorities, not character classes or alternate endings.
Combine these priorities freely. They record your priorities. Story decisions remain available at their quests; these notes do not mark achievements earned.
Choose how thoroughly you explore and build alongside the campaign. Optional challenge replays and local achievement decisions are separate from the story's conclusion.
Rules, recommendations and what is still uncertain
Checked 10 October 2026. These notes review selected claims that affect a run; they do not certify every walkthrough step or your save.
Guide-reported restriction
Choose the mode before the achievement route
Gamepressure reports that Story mode disables achievements. Standard remains this guide’s recommendation; Impossible adds permanent death.
The installed-game warning was not tested in this review.
Changes save with this playthrough and travel in its progress backup.
Choose an exploration & crafting approachSuggested plan: Oxygen-first explorer
Find a style that fits your priorities
These are equipment and expedition priorities, not character classes or talent trees. Standard supports a flexible first campaign; Impossible is a separate permanent-death challenge, while changing equipment priorities during ordinary progress needs crafting and travel rather than a respec.
Reorder the comparison without changing your game settings or story preferences.
Short trips, known refuges and steady discovery
Oxygen-first explorer
Extend your safe working radius before pursuing distant objectives. Craft scanning and oxygen equipment, establish reliable refill stops, and make short trips with a clear return destination. You explore more effectively because tools and air are ready when a discovery matters. The plan starts immediately on Standard and remains useful when vehicles and specialized suits arrive later.
Learning curveApproachable
The main habit is reserving return air while learning tool, inventory and refill limitations.
Choose this when you wantA manageable first Standard playthrough · Exploring wrecks without desperate returns · Collecting blueprints alongside story progress
Reconsider if: You want to rush every distant marker; You dislike planning return journeys and supplies.
What you actually do
A practical rhythm, from preparation to payoff.
1
Set the return point
Choose the oxygen refuge that ends the trip before leaving, then check tool condition and the task materials; a distant marker is not a complete expedition plan.
2
Turn back deliberately
Use the displayed air meter and actual travel time to stop gathering while return remains safe; carry an emergency refill rather than treating it as routine extra range.
Illustrative play example
An illustrative salvage trip
Suppose you need glass from a wreck beyond your familiar shuttle circuit. Take the required tool, enough supplies and an emergency refill, and identify a nearer functioning air stop before collecting. When the suit meter approaches your conservative return threshold, leave even if another attractive object remains. Deposit the haul and plan a second trip if needed. This is an illustrative safety routine, not an exact travel-distance formula or a claimed no-death test.
FROM A REALISTIC START TO THE PAYOFF
Your progression path
Read in order. Each stage explains what makes the next step practical.
1Opening
Scanner and first oxygen extension
Gather nearby materials on short routes, learn the tools needed for new resources, and craft the initial oxygen and scanning equipment when its blueprint is available. Keep materials for survival needs instead of spending everything on a single distant objective.
2First payoff
A tested chain of oxygen refuges
Establish or repair accessible refill opportunities and verify they actually work. Add a portable oxygen option only with the means to replenish it. Collect blueprints during useful material trips and leave space for discoveries instead of making a separate journey for each item.
3Mature
Vehicles and hazard-specific expeditions
Use vehicle access and suit upgrades as the story supplies them. Pack the particular tools and hazard protection required by the destination, then keep the return route intact. Longer range should serve a defined objective, not encourage an indefinitely expanding unplanned trip.
Guide progression diagram — an authored explanation, not an official skill tree or measured ranking.
Strengths, tradeoffs & requirements
Strengths
Useful before building a base
Supports blueprint collection and story exploration
A small early investment reduces repeated unproductive travel
Tradeoffs
Preparation uses scarce early materials
Refill points need verifying rather than assuming endless air
Extra air does not protect against electricity, radiation or combat
Plan around these requirements
Standard for a forgiving first campaign
Scanner and oxygen equipment as unlocked
Emergency refill and functioning known oxygen stop
Task-specific tool plus food/water reserves
Preparation kit
The supporting roles that make this style work.
Scanner
Unlock and identify equipment paths during exploration.
Oxygen equipment and refill
Extend safe range and recover from a small planning mistake.
Correct harvesting tools
Prevent arriving at a deposit you cannot use.
Food, water and empty storage space
Support useful work rather than a trip that ends immediately with a full inventory.
CARRIED INTO YOUR WALKTHROUGH
What to prioritize
Prioritize scanning and oxygen extensions before distant material hunts
Pair story objectives with blueprint collection and verified refuges
Keep one-time jokes and intentional-death achievements on appropriate saved runs
Can you change your mind? You can adopt engineering or combat priorities using the same Standard save once blueprints and materials are available. Oxygen equipment remains useful; a new crafted suit or tool changes the kit rather than reallocating nonexistent talent points.
Source-based strategy
Original-game specialists support the equipment sequence. New sequel oxygen machines, nests and suit numbers are deliberately excluded.
Version context: Original Breathedge on PC, checked 10 October 2026. The latest numbered patch could not be independently established. Its documented chapter and survival mechanics support these plans; Breathedge 2 Early Access mechanics and uncorroborated recipe numbers are excluded.
Research and recommendation basis · 4 references
A safe oxygen loop is the default because it supports every later task. Engineering and combat are equipment priorities within the same campaign, while Impossible is an informed replay option; no numerical strongest-build ranking exists for these plans.
Extra guidance adds smaller actions and local checks where available. Compact reduces spacing and cover size; it keeps the full instructions, warnings and choices. Quiet backgrounds reduce decoration. These options change the guide, not the game’s difficulty.
Dotted item names have quick details. Hover with a mouse, tap, or focus the name and press Enter. Stats stay in a small pop-up.
New to guides? Six useful terms
Build or play style
The skills, equipment or management priorities you choose to work together. Use the guide’s selection to get the matching advice.
Prerequisite
Something you must already have or finish before an instruction works. Read these before spending resources or travelling.
Missable
A reward or event that can become unavailable after a choice or deadline. The local note explains the particular restriction.
Checkpoint
A pause to check your result. A guide checkbox records your observation; it does not save the game or award an achievement.
Optional branch
A different outcome or side activity. You do not have to complete mutually exclusive paths in one playthrough.
Guide backup
An exported copy of your guide progress. Keep any game saves separately using the options available in that game and difficulty.
Returning player: find your section · titles may contain spoilers
Jumping changes your bookmark; it never marks earlier steps complete. Build and outcome choices stay in your current playthrough.
Equipment, blueprints & expedition recordsAbout this guide · version, coverage and sources
Chapters 1–6 + Steam achievement route
Oxygen, crafting, vehicle progression and local missable reminders throughout the original game’s six chapters.
Version context: Original PC Breathedge; latest numbered patch not independently established. The four original-game playstyles retain documented oxygen, equipment and chapter gates. Current searches heavily mix in Breathedge 2; no sequel mechanics or unverified current patch number are used.
Builds & playstyles · 4 plans reviewed
Checked 2026-10-10: Original PC Breathedge; latest numbered patch not independently established.
The four original-game playstyles retain documented oxygen, equipment and chapter gates. Current searches heavily mix in Breathedge 2; no sequel mechanics or unverified current patch number are used.
This is a source review of build dependencies, not an in-game playthrough or damage benchmark. It does not certify every quest, achievement trigger, random drop or installed mod.
Reviewed plans and corrections
Oxygen-first explorer · Retained. No broken required mechanic found in the checked sources; retained within the stated scope.
Base and vehicle engineer · Retained. No broken required mechanic found in the checked sources; retained within the stated scope.
Blaster and Normandy specialist · Retained. No broken required mechanic found in the checked sources; retained within the stated scope.
Conservative Impossible challenge · Updated. Corrected the recommendation while preserving this viable playstyle and its saved selection.
Outdated or unsupported advice excluded
Breathedge 2 Early Access tools, recipes and oxygen systems are excluded.
Replace worn tools instead of promising a generic tool-repair action.
Campaign steps, achievements, vehicles, survival coaching and diagrams were screened. Chapter-award timing, early progression and the reported speed-run target received specific source checks.
Source-based audit with documented gaps. Section screening is not individual fact verification, and no complete current-version playthrough is claimed.
Corrections in this review · may contain spoilers
The community route places the award after Normandy repairs; the old line implied the radiation circuit alone was sufficient. Reference
Align the achievement tracker with the actual reported story transition. Reference
The local callout overstated the condition already qualified in the achievement tracker. Reference
Do not turn a disputed threshold into a guaranteed failure. Reference
Shared outcome coaching still used the earlier absolute timer warning. Reference
Resolve conflicting research-unlock advice with the documented fragment route without inventing a version change. Reference
Remaining verification
Quick draw timing is inconsistent across community reports; seven hours is a reported target, not a verified current hard cutoff.
Several hidden collision and ship counters remain untested. The newest numbered original-game build was not independently established.
Sources and what they support
Community campaign achievement walkthrough — Read chapter 1 through final arena, including chapter-award timing, vehicle unlocks, counters and reported timer inconsistencies. Older community observations; not current executable testing.
Quick draw player reports — Carried forward from the preceding current-build audit; no independent timing test in this pass.
Scrapper upgrades — Read 35/99/999 durability and blueprint/recipe distinctions.
Bio Module — Read scanner prerequisite, four charges, upper controls, red button and tank retrieval.
Frozen shuttle — Read ten Beef Pellets, two Synthetic Manures per pellet and external launch controls.
ZAZ construction — Read fragment locations, two cores, lycoplasma and transport construction. Research-table alternative conflicts with the community walkthrough.
Achievement actions — Read opening achievement entries; later entries not treated as independently checked from this page.
Before you commit: All 54 Steam names are tracked manually; shorter console lists have a different scope.
Coverage limits, evidence dates & corrections
Every decorative item, poster, tape and loose resource is not individually catalogued.
Some obscure achievement counters have conflicting reports; an exact threshold is not invented where reliable evidence is missing.
Source-researched · no complete playthrough validation. Source sample checked 2026-10-09; roster checked 2026-10-10. Retained version/roster evidence and sampled route claims. This is not a fresh visit to every citation or a completed gameplay test.
Choice comparisons start closed. The surrounding walkthrough, chapter titles and search results can contain spoilers.
Chapters 1–6 with crafting, oxygen and vehicle progression, local missable reminders, and all 54 Steam achievements. Outcome comparisons contain spoilers and start closed.
Use Standard for a first achievement campaign. It retains survival needs and reloads without the permanent-death cost of Impossible. Gamepressure's released-game guide reports that Story disables achievement…
Continue directly to the opening interrogation: its dialogue has an achievement before the shuttle repairs. No equipment planning is needed yet.
Playthrough profiles and portable progress
Each profile keeps its own build, actual outcomes, equipment and checklists. Up to eight profiles per game.
Use the guide’s progress backup to transfer all profiles between the website and offline copies. The website stores signed-in progress. Downloads keep a separate browser record.
Your actual character, equipment or settlement
Record only information that affects your next decision. Blank fields mean unknown. These entries describe your game and never change it.
Record usable oxygen, actual suit/tools and vehicle readiness before a long trip. An uncrafted blueprint does not extend the current return range.
Make oxygen refuge and return routes part of each expedition. A speedrun or Impossible attempt needs a separate deliberate run plan.
Keep counters and local missable interactions visible before clearing the final easy enemies or advancing machinery.
Equipment and resources for this plan
Oxygen balloon
The opening travel-range improvement must actually be equipped.
Alternative and sources
Use short trips from the existing oxygen refuge and return before the reserve runs low.
The original app is released, has 54 matching achievement names and no DLC in the current public metadata. News on that app also promotes the separately released Breathedge 2.
Achievement names and counts were compared with public Steam records. Quest outcomes and hardest-difficulty builds were sampled from sources, not validated by a completed playthrough.
Authored coaching synthesized from this guide's existing route, builds and source bibliography. This date records the data/anchor review, not fresh verification of every linked page or hands-on gameplay. Facts are entered manually; recommendations do not read the game save, certify achievement unlocks, or cover every possible state. Existing coverage limits: All 54 Steam achievement names are included. Some console lists contain 45 and do not include the full PC set. Tracking is manual and does not read Steam or the game save. The route covers the campaign, essential upgrades, vehicles and achievement actions. It does not list every poster, decorative toy, tape or loose resource. Illustrated references are linked at difficult searches; they are genuine reference pages, not generated location pictures. Several obscure counters have inconsistent community reports. Where no reliable exact threshold is established, the guide describes the action and tells you to verify the unlock instead of inventing a number. No claim is made that these routes were playtested on your installed build.
Coaching review: 2026-10-09 · Synthesis of cited guide sources. Guide checks do not claim a personal completion playthrough.
Actual outcomes are separate from intended outcomes.
Named profiles preserve separate campaigns.
Stable task checkpoints preserve existing completion records.
Online and offline editions share the same interface.
Choose oxygen-first exploration, practical base/vehicle construction, or personal/Normandy combat preparation. Progress comes from blueprints, crafted tools, protection and oxygen refuges; Impossible is a separate learned challenge plan.
Progression plan
Oxygen-first explorer
A forgiving first Standard campaign with the fewest desperate return trips.
Start with this setup
Standard mode; keep manual saves before one-time jokes.
Craft and Oxygen Balloon before distant paint or glass trips.
Use short resource circuits between known air refuges; reserve an emergency oxygen refill.
Preview this plan from the beginning to the endgame · 6 stages
Equip the balloon, then use the to unlock the nearby air refuge.
Prioritize the double balloon and first accelerator before evacuation.
Scan the Oxygen Cylinder and Large Accelerator.
Craft and before the tape-tunnel trip.
After securing early air capacity, collect the initial accelerator clue at the icy wreck to the right of the first home, near the lamp and shawarma. The nearby toilet area supplies its unusual fluid ingredient. At the Chapter 2 shelter, look left toward the asteroid-shadowed wreck about 300 meters away and scan the engine-fitted coffin for the Large Accelerator. Those are concrete travel upgrades before broad scavenging. Use the Research Table or the two later wreck fragments for the Jet Accelerator only when its generator and inductor bill will not delay life support. Confirm both equipment changes before extending your safe return distance.
Powered oxygen base and Research Table first.
Research the correct electrical/temperature suit, then work through the six radiation tasks.
Build ZAZ for protected oxygen during travel.
Collect military-cylinder and jet-accelerator fragments during existing mission trips.
Keep a repair route behind you; retreat around half hull.
Reach gun level four before removing the last easy coffin spawner.
Bring multiple Blasters, a useful Scrapper and medkits.
Do the ten final-arena coffins before finishing machinery.
Your completion route: Complete the six radiation objectives, Normandy chapters and final encounter, then verify the 54 PC achievements. Scene-specific misses and the under-seven-hour target may need a focused replay.
Changing your plan keeps your saved achievements, quest choices and checklists. Required respecs, unlocks and later equipment are explained at their route steps.
Browse picture and diagram checkpoints 6 references
Open the matching walkthrough section. Its choices, build advice and checklists stay together.
This is the original Breathedge. Breathedge 2 is a separate game; no story expansion is required for this route.
There are no classes, character levels or controllable party members. Select a survival and equipment plan; its advice appears as you reach the relevant workbench or destination.
Standard is the recommended achievement run. Gamepressure's released-game guide reports that Story disables achievements; this audit did not independently test the installed mode warning. Impossible has permanent death. Use a separate Standard save for the deliberate-death joke.
The Steam listing identifies the original Breathedge release as 25 February 2021. Recent announcements include Breathedge 2, which is a separate game and must not be imported into this guide.
No currently installed patch number was verified. The route evidence is for the released six-chapter original game; dated guide pages are marked as such.
The route covers the original Breathedge campaign. Breathedge 2 announcements do not change this game’s 54-entry PC roster or add another chapter here.
Check achievements already earned · 54 available
Check confirmed platform unlocks. Untick a target to defer it. Finishing a walkthrough step never checks an achievement automatically.
Survivor
Seal the starting pipe with the chewing gum.
Chicken dielectric
Use the immortal chicken to neutralize three electrical leaks.
Smuggler
Find the smuggler near the paint cloud and take the eye for the safe.
Concussion
Use the tutorial joke item to strike yourself three times.
Small puffs of gas
Accumulate five minutes of accelerator use during your trips.
Sherlock
Collect all four items at the pink wreck: hammer, note, Novichok packet and helmet condom.
BDSM fan club
Choose the two additional spit responses after the automatic one during the opening interrogation.
Multilayer
Collect the underwear in the male shuttle wreck behind the start.
A contributor to the industry
When the coffin investigation asks, select the response saying your game is licensed.
The power of the Unicorn
Use the Dispenser to construct the small replacement airlock.
A complete idi…
At the Chapter 2 drill interrogation, persist through the fatal self-threat joke on a separate Standard save.
Almost served
Enter through the sentry after crafting and equipping the Military Spacesuit.
Heroic deed
Feed five Discharge Cells to Knight Errant and fire its cannon.
Trust me, I'm an engineer
Collect the Engineer ID after the door-breaking attempt in the battering-ram shuttle.
Butthurt
Use the crafted Igniter on the body at the Mayo controls and start the centrifuge.
Complete Chapter 3
Continue the rapid chapter transition after the radiation sequence and Normandy objectives; chapter notifications can appear close together.
Complete Chapter 2
Complete the radiation tasks, reach Normandy and finish its repairs. The Chapter 2 award is reported at the Normandy repair transition, rather than merely approaching the ship.
Destructor
Break the engineer-area door before the normal opening method; Knight Errant provides another documented chance.
Mutagen
Scan all three mutant specimens before using the laboratory control that changes the chamber.
Shepherd
Scan the cow wearing a spacesuit in the Bio Module.
Sir, no sir!
Destroy the coffin general distinguished by red arrows.
Sharpshooter
Fire the Blaster 100 times; use targets along the route rather than exhausting it before a required fight.
The right choice
Complete the cooling-station two-button interaction; either response progresses the linear story.
Big machine gun
Kill coffin robots until Normandy’s guns reach level four.
Undertaker
Destroy at least ten hostile coffin robots.
Wasted!
Finish the final encounter and story.
Psychiatrist
Take the letter in the floating locker at the tea-party wreck right of the military module.
Driver
Construct and drive the ZAZ-1 after obtaining its blueprint and vehicle platform.
A rebel
Press red when the Bio Module computer tells you to press green.
Mumbo jumbo
Use the working teleporter near the coffin/cryo-repair area and follow the suit’s instructions.
Airlock master
Perform ten docking interactions; the same airlock can be reused.
Hacker
Open twenty different coffin backs with the .
Saboteur
Destroy three coffin stations after finishing the useful gun-upgrade farming.
Auto repair shop
Use ship repair repeatedly; aim for ten repair visits and verify the unlock.
Vacuum cleaner
Collect the vacuum blueprint set, construct the vehicle and ride it; do not rely solely on finding the free bike.
Machine gunner
Use Normandy’s unlocked weapons against the hostile coffin waves; verify the unlock during the gun-upgrade loop.
Artist
Examine the drawings on all three mannequins in the wreck left of the first shuttle.
Pew-pew!
Destroy the anti-asteroid guns around the police module, forward module and accelerator.
Toucher
Touch half the trees in the habitation dome.
Electronic
EMP-disable electrical rings and collect six Breathedge Energy Cores.
Coffin Counter
Trigger the ten unique battlefield comments around Normandy; get out of the enclosed car when approaching each scene.
A menace to cows
Shoot all floating synthetic cow bodies at the destroyed pasture station.
A Persistent One
At the first docking station after the Normandy jump, repeatedly attempt the broken controller before repairing the station.
Quick draw
Guides recommend finishing the campaign in under seven hours for Quick draw. This is a conservative planning target: player reports describe inconsistent timer behavior, and the exact current cutoff was not independently tested. Do not rely on rollover exploits.
Voyeur
Inspect the Normandy windshield scene after the prison/accelerator sequence before departing.
Think with your own head
Touch every tree in the habitation dome before leaving.
Pollutionist
Destroy ten cleaning robots in the tunnel and Knight Errant areas.
Bandit
Stun three security robots with the Blaster, then finish each with an EMP grenade.
Cartographer
Fly into outer space until prompted to open the map, then open it.
Ice breaker
Destroy the small ice spheres around the cooling station, including the one hidden in nearby tubular wreckage.
Careful driver
Accumulate asteroid-collision damage while keeping the ship alive and repairing between attempts.
Dodger
Pass through 25 distinct qualifying rings; include electrical and hot/stone passages, not tape rolls.
Competitor
Destroy the repair robots around the three repair shops and the additional coffin-station area.
The breathtaking!
Destroy ten coffin robots in the final boss encounter before completing its machinery objective.
Compare story outcomes · 3 decisions
Each option explains its consequences. Your choice is repeated at the relevant step; alternatives remain available.
Which run are you planning? · UndecidedWhich run are you planning?Compare settings and their effects
Standard exploration and achievements
Allows reloads and achievement progress. Best fit for this full route, including controlled attempts at one-time jokes.
Impossible survival challenge
Permanent death and missing markers make mistakes much more expensive. The Steam list does not require this difficulty. Voluntary fatal/collision targets should be done separately.
Bio Module button: achievement or obedience · UndecidedBio Module button: achievement or obedienceCompare choices, rewards & consequences · spoilers
Press red for A rebel
The red response supplies the achievement while the linear story continues; it does not select an evil ending or kill a companion.
Follow the green instruction
Continues the mission without the A rebel action. Keep an earlier save if you want that achievement later.
Exploration or Quick draw timing · UndecidedExploration or Quick draw timingCompare settings and their effects
Explore first
Keeps collection, construction and dialogue detours in the main route. Consider a separate practiced run for the guide-reported seven-hour target; exceeding seven hours does not establish failure because reported timer behavior is inconsistent.
Practiced under-seven-hour replay
Prioritizes the required campaign path. Long optional counters and extensive decoration work against the target; preserve the exploration save.
Chapter 1 of 13
Chapter 1
IN CAMPAIGN ORDER
Choose a mode, then begin the interrogation
Which run are you planning?Compare settings and their effects
Standard exploration and achievements
Allows reloads and achievement progress. Best fit for this full route, including controlled attempts at one-time jokes.
Impossible survival challenge
Permanent death and missing markers make mistakes much more expensive. The Steam list does not require this difficulty. Voluntary fatal/collision targets should be done separately.
Exploration or Quick draw timingCompare settings and their effects
Explore first
Keeps collection, construction and dialogue detours in the main route. Consider a separate practiced run for the guide-reported seven-hour target; exceeding seven hours does not establish failure because reported timer behavior is inconsistent.
Practiced under-seven-hour replay
Prioritizes the required campaign path. Long optional counters and extensive decoration work against the target; preserve the exploration save.
1. Use Standard for a first achievement campaign. It retains survival needs and reloads without the permanent-death cost of Impossible. Gamepressure's released-game guide reports that Story disables achievements; this mode restriction was not independently tested here. Free mode has no campaign plot or tasks.
2. Continue directly to : its dialogue has an achievement before the shuttle repairs. No equipment planning is needed yet.
Quick draw asks for a fast campaign, while this walkthrough takes time for exploration. If you want the speed achievement, use a learned later run; the reported target is under seven hours.
Record a choice or pause this section (optional)
Use this only if you are stuck or want to come back later. Otherwise, leave it on “Continue normally” and use “Mark section complete” below when you finish.
Use this while working through the section. This menu changes your guide’s progress reminders, not anything in your game.
Choices you made in the game
Record the option you actually chose in the game. Leave decisions you have not reached blank. These records are separate from your planned choices.
Individual tasks and achievements keep their own checkmarks.
IN CAMPAIGN ORDER
Opening joke, chewing gum and the intercom
Which run are you planning?Compare settings and their effects
Standard exploration and achievements
Allows reloads and achievement progress. Best fit for this full route, including controlled attempts at one-time jokes.
Impossible survival challenge
Permanent death and missing markers make mistakes much more expensive. The Steam list does not require this difficulty. Voluntary fatal/collision targets should be done separately.
1. During the interrogation, keep choosing the option to spit. Count the automatic spit and your two subsequent choices. Do this now; passing the scene removes the opportunity from the current run.
2. In the capsule, pick up the floating chewing gum, equip it in a quick slot and apply it to the leaking pipe. Find the intercom, inspect the exterior antenna and the opposite-side panel, then return to the processor.
Help sealing the leak and starting repairs
Where to look: Begin in the interrogation and read this stop’s opening-dialogue checklist before advancing it. The chewing gum and leaking pipe are in the capsule reached afterward.
What to do: Complete the opening dialogue you intend to follow. In the capsule, equip the gum in a quick slot and apply it to the leak, then inspect the intercom and its indicated exterior parts before crafting the requested .
What should happen: The opening conversation has finished and the capsule leak is sealed. Later, the crafted Cryptographic Debugging Station must actually be used on the intercom.
If it does not work: If you are still in the interrogation, capsule equipment is not available yet. At the leak or intercom, check that the correct item is equipped before interacting; keep gathering trips short enough to return with spare oxygen.
3. Gather two metal and one wire immediately around the shuttle. Craft the Cryptographic Debugging Station, equip it, and use it on the intercom. The name is a joke; the action advances the required crafting tutorial.
PLAY & BUILD COACHING
First excursions
Plan a short outward leg and a short return. Do not treat the full oxygen number as travel time in one direction. Stop gathering when the return becomes uncertain; arriving with spare air is more valuable than one extra piece of metal.
The first supply loop
After sealing the leak and fixing the intercom, make short trips just outside the capsule for metal, wire, ice and food materials. Bring them back to the processor before moving farther away. Water uses 2 Ice; food packages use Nutritious Goo and Ice. Pick up found food packages too, both for immediate supplies and to reveal their recipes.
PLAY & BUILD COACHING
Watch three reserves separately
Oxygen determines when you must reach air; food and water support the longer outing. Craft a drink and carry food before the balloon/ trip. An inventory full of metal is not a substitute for a usable oxygen reserve.
Record a choice or pause this section (optional)
Use this only if you are stuck or want to come back later. Otherwise, leave it on “Continue normally” and use “Mark section complete” below when you finish.
Use this while working through the section. This menu changes your guide’s progress reminders, not anything in your game.
Choices you made in the game
Record the option you actually chose in the game. Leave decisions you have not reached blank. These records are separate from your planned choices.
Update earned achievements (optional)
Survivor
Seal the starting pipe with the chewing gum.
BDSM fan club
Choose the two additional spit responses after the automatic one during the opening interrogation.
Finish the Scrapper first so electronic/container salvage becomes available, then collect the actual Drill blueprint and Back Scratcher, and make the tools their recipes unlock. Use the Drill for asteroid aluminum and the Grabber for glass. Only after those are functioning should the paint/glass expedition begin.
1. Make a Handy Scrapper from three metal. Carry a spare while durability is low; it breaks containers and electronic salvage, which supply otherwise awkward components.
2. Follow the tutorial to make Crap Imposed by the Developers from two refined metal, tape and wire. Equip it and hit yourself three times for Concussion before putting it away.
3. Take the Drill blueprint from the table beside the processor. Looking at the paper is insufficient: collect it. Make a drill with refined metal, a battery and thick electrical tape. Pick up the back-scratcher near the bed to discover the Grabber.
Before leaving the opening capsule for a large salvage trip, take the Drill blueprint off the table beside the processor. Merely pointing at the paper does not register it, so confirm the recipe appears in the crafting list before spending your air searching for its ingredients. Make the Drill from the listed refined metal, battery and thick electrical tape, then place it where you can equip it without searching the backpack outside. Keep the Scrapper for breakable debris and save Drill durability for material nodes that require it. If a resource refuses the tool you are holding, return to the recipe and interaction prompt rather than burning through a spare. A short, successful tool test near home is a better checkpoint than carrying several untested recipes into a distant wreck.
Help collecting and testing the Drill
Where to look: Inspect the table beside the processor for the Drill blueprint. Check your crafting list after picking up the paper.
What to do: Collect the blueprint, craft the Drill from its listed ingredients and equip it before a nearby tool test. Keep the Scrapper for debris that calls for it.
What should happen: The Drill recipe is available, the tool exists in inventory and you can use it on an appropriate resource interaction.
If it does not work: If the recipe is absent, return to the table and collect the blueprint rather than merely looking at it. If a node refuses the equipped tool, read its prompt before wasting durability or traveling farther.
4. Reserve one functioning Grabber and Drill plus the materials to replace them. Do not spend your last battery on a decorative build and then discover you need that tool to collect the ingredient for another battery.
gear
Working expedition kit
Take a usable Scrapper, Drill, Grabber, emergency oxygen and food/water. The teaches the pickup and crafting; acquire it there before a scan-dependent trip. Put the required tool in a quick slot before approaching its resource.
Need to pause this section? (optional)
Use this only if you are stuck or want to come back later. Otherwise, leave it on “Continue normally” and use “Mark section complete” below when you finish.
Use this while working through the section. This menu changes your guide’s progress reminders, not anything in your game.
Update earned achievements (optional)
Concussion
Use the tutorial joke item to strike yourself three times.
Individual tasks and achievements keep their own checkmarks.
IN CAMPAIGN ORDER
Descend for the balloon and scanner, then open an air refuge
Exploration or Quick draw timingCompare settings and their effects
Explore first
Keeps collection, construction and dialogue detours in the main route. Consider a separate practiced run for the guide-reported seven-hour target; exceeding seven hours does not establish failure because reported timer behavior is inconsistent.
Practiced under-seven-hour replay
Prioritizes the required campaign path. Long optional counters and extensive decoration work against the target; preserve the exploration save.
Progression at a glance
Open the first air refuge in two passes
Separate discovery and crafting from the trip that opens the refuge.
1
Reconnaissance
Descend from the first shuttle
Inspect the giant balloon and the Scanner by the locked lower-wreck door, then return for air.
Collect Metal, a Battery, Plastic and a Light Bulb, then craft it.
3
Revisit the locked door
Scan the console
Open the door and examine the broken oxygen equipment for station and refill-generator blueprints.
4
Verify the relay point
A working air supply comes first
Confirm oxygen replenishes before planning the next leg from here; portable stations also need refill supplies.
Guide diagram. Original trip sequence, not a scale map. Split material gathering into additional safe outings if needed; use the equipped oxygen display.
1. From the first shuttle, descend toward the wreckage and oversized inflated balloon. Inspect it for the oxygen upgrade, collect nearby oxygen candles, and inspect the beside the lower wreck's locked door. Return for air instead of trying to finish the whole wreck at once.
The oversized balloon is a direct examination: you do not need a to learn this first recipe. If absent at the processor, revisit the balloon below the capsule near the rock wall. For the condom, make a separate short trip toward the pink wreck and nearby lockers, then return to craft/equip the balloon before the longer scanner-door trip.
2. Build the first Oxygen Balloon using a condom, wire, two plastic and thick electrical tape; equip it. You will collect a condom at as well. Treat the equipped oxygen display as authoritative; published guides sometimes confuse the upgrade bonus with total capacity.
3. For the , collect metal, a battery, plastic and a light bulb. Break electronics for the first two components; the lamps at the pink wreck provide easy bulbs. Craft it, return to the locked door and scan its console. Examine the broken oxygen unit beyond it to learn portable oxygen-station and refill-generator blueprints.
Illustrated route · read left to right
First air refuge: inspect, return, reopen
First-person views · inspect the wreck → craft at home → return.
1 · Inspect the lower wreck
Descend below the starting shuttle. Examine the inflated balloon near the rock wall without a Scanner, then inspect the scanner device on the wall to the right of the locked door.
2 · Return home to craft and equip
Return to the shuttle for air and crafting. Build and equip the Oxygen Balloon and craft the Scanner; gather missing ingredients on separate short trips if needed.
3 · Scan the console and verify air
Revisit the same wreck and scan the door console. Enter, confirm oxygen refills, and examine the broken oxygen station inside to learn the portable equipment blueprints.
PLAY & BUILD COACHING
Relay approach
Use this refuge as the start of the next expedition, rather than calculating every return all the way to the original shuttle. Portable oxygen stations are useful only if you bring their refill supply too.
PLAY & BUILD COACHING
Open the refuge in two passes
First identify the balloon and locked console, then return home with their ingredients. Equip the crafted balloon and Scanner for the second pass. Scan/open the console, examine the oxygen equipment, and verify a working air supply before making that location the next leg's starting point. If the ingredients do not fit one safe outing, split the trip; there is no timer requiring the whole opening wreck in one breath.
Establish a return limit from the equipment actually fitted
At a working air source, fully refill and note the displayed oxygen time. On a short familiar leg, note the oxygen used to travel out and come back with the same movement method. For a new search, reserve the observed return cost plus a margin for one wrong turn before spending any oxygen on scanning or looting. Do not count an empty portable station, an unbuilt blueprint or a candle left in storage as a refill.
Turn back when the remaining display reaches that reserve. If you cannot identify the next air point from the last safe landmark, return and place/refill the intended relay first. Emergency candles support recovery; they are not proof that a longer route is safe. This is a conservative route-planning rule, not a fixed oxygen threshold that overrides your suit or movement speed.
Upgrade only after the first refuge works
Once the first balloon is equipped and the nearby refuge works, look for the next oxygen upgrade along the wreck field instead of stretching every trip to the last second. The double-balloon clue is a drawing in the children's wreck near the asteroid, beyond the blue wreck roughly ahead and below the starting capsule. Scan that drawing and return to the processor; this upgrade replaces the single balloon, so it does not require carrying both as if their bonuses stack. Check the complete recipe before setting out again, including its two condoms, wire, plastic and tape. If the route takes longer than your present reserve safely allows, stage the journey through the refuge and collect materials on separate outings. Confirm the equipped oxygen display increased before committing to the wider circuit.
AFTER FOLLOWING THIS SECTION
Equipment and readiness check
Update these only after collecting the item or checking the result in your game.
Oxygen balloon
The opening travel-range improvement must actually be equipped.
Record it as owned after collecting or preparing it in your game.
Alternative and evidence
Use short trips from the existing oxygen refuge and return before the reserve runs low.
Your entries save with this playthrough and travel in its exported backup. Values are manual; the guide does not read the game.
Record both travel legs, current oxygen and a positive safety reserve.
Measure the return separately; it can take longer than the outward journey. Only reuse timings with the same equipment, movement and refill landmark. Combat, cold, obstacles and navigation mistakes need more time. Test short legs, refill before departure and turn back early; an untested refill ahead is not an established safe return point.
Landmark orientation and dependency schematic, not a scale map or game-coordinate chart.
Two passes, with a return home between them
Two passes through the first lower wreck. First return home to craft the Scanner and equip the balloon; the door is not a proven air stop until you open it and verify a refill. Arrows show travel order, not compass bearings or distances.
1
A · Refill in the starting shuttle
Read your equipped oxygen display before departure.
2
B → C · Inspect the lower wreck
Find the balloon clue and scanner-locked console. A locked door is not a refill.
3
Return to A · Build and equip
Craft the Scanner and balloon; make a separate bulb trip only if needed.
4
C → D · Open, enter and verify
Scan the console. Confirm oxygen rises inside before treating D as a refuge.
At A, fully refill and note the oxygen display with your actual equipped suit. Make the first outward trip short; collect/examine the oversized balloon clue and identify the scanner-locked console below the starting shuttle. The balloon clue is learned by examination, not by a Scanner.
Return to A before making the locked wreck your base. Build and equip the first balloon, gather the Scanner ingredients shown in your processor and craft it. If a light bulb is missing, the nearby pink wreck’s lamps are an optional separate supply loop; return home to finish crafting.
On Pass 2, follow the same lower-wreck landmarks, equip the Scanner and scan the door console. Enter, verify your oxygen actually refills, then examine the broken oxygen unit for portable oxygen equipment blueprints. A discovered blueprint or locked door is not a refill.
Change D from an unverified node to a confirmed refill only after that check. Start the next short exploration from the last working air point. A portable oxygen station later needs usable contents/refill supply; distinguish it from the autonomous refuge.
Chosen route policy: record outward and return oxygen use separately with the same equipment and movement. Keep the observed return cost plus a chosen navigation margin untouched while scanning/looting. Turn back when the remaining display reaches that reserve; a new refill ahead cannot be included until tested.
A wrong turn, obstruction, cold hazard or tool search can lengthen a trip. This diagram establishes orientation and dependencies, not a fixed safe radius, compass bearing or oxygen duration. Emergency oxygen is backup, not proof that a route was measured.
Worked arithmetic, using invented example values
Example only, not game measurements: with 90 seconds displayed, 20 seconds observed outward, 24 seconds observed return and 15 seconds chosen margin, at most 31 seconds remains for stationary work (90 − 20 − 24 − 15). Turn back while at least 39 seconds remains (24 + 15). Enter your own suit/route values.
Confirm in your game
These observations start unchecked. They are separate from achievements and do not complete this section automatically.
Keep your observations with this playthrough
Enter the game date, ship or residents and what actually happened. Leave unknown values blank. Update the record when you change the setup; export a progress backup before replacing notes you want to retain.
Use this only if you are stuck or want to come back later. Otherwise, leave it on “Continue normally” and use “Mark section complete” below when you finish.
Use this while working through the section. This menu changes your guide’s progress reminders, not anything in your game.
Choices you made in the game
Record the option you actually chose in the game. Leave decisions you have not reached blank. These records are separate from your planned choices.
Individual tasks and achievements keep their own checkmarks.
IN CAMPAIGN ORDER
Investigate the pink wreck and nearby sight gags
1. Below the starting shuttle, find the pink bedroom wreck with an astronaut tied to a bed. Collect the hammer, the note on the bedside surface, the condom on the helmet, and the floating Novichok packet behind the bed. Some older guides mislabel the last item as a condom box. Take all four to avoid an incomplete Sherlock trigger.
2. Refill, then sweep left of the starting shuttle for the mannequin wreck. Examine the drawings on three mannequins' backs. Behind the shuttle, inspect the underwear in the men's wreck.
3. The sparking wreck behind the shuttle has three electrical hazards. Use the immortal chicken on all three; approach each from a safe angle instead of brushing the exposed wire yourself.
gear
Keep the useful evidence
The condom and bulbs feed your early crafting route. Finish examining and collecting the evidence first, then use materials at the processor. The humor has no branching murder verdict or companion consequence.
Need to pause this section? (optional)
Use this only if you are stuck or want to come back later. Otherwise, leave it on “Continue normally” and use “Mark section complete” below when you finish.
Use this while working through the section. This menu changes your guide’s progress reminders, not anything in your game.
Update earned achievements (optional)
Chicken dielectric
Use the immortal chicken to neutralize three electrical leaks.
Sherlock
Collect all four items at the pink wreck: hammer, note, Novichok packet and helmet condom.
Multilayer
Collect the underwear in the male shuttle wreck behind the start.
Artist
Examine the drawings on all three mannequins in the wreck left of the first shuttle.
Individual tasks and achievements keep their own checkmarks.
IN CAMPAIGN ORDER
Get an accelerator and expand your oxygen reserve
1. Travel right from the first shuttle toward the cold debris. Collect the shawarma near the toilet scene and yellowish water; combine them with refined metal for the initial Accelerator. Equip it and use controlled boosts on safe straight stretches.
2. Look below and forward from the starting airlock, behind the blue wreck, for the asteroid with children's objects. Scan the drawing for the Double Oxygen Balloon. Its materials are two condoms, two wire, four plastic and two thick electrical tape. It replaces the first balloon.
3. Accumulate boost time naturally during supply runs. Do not boost blindly into a new corridor just to advance the counter: a faster outward trip still needs a reachable oxygen stop.
Checkpoint· Radiation is not cold protection
The upcoming lead-painted equipment lets you cross radiation; it does not make ice or electrical fields harmless. Warming lamps and a clear return path still matter.
Need to pause this section? (optional)
Use this only if you are stuck or want to come back later. Otherwise, leave it on “Continue normally” and use “Mark section complete” below when you finish.
Use this while working through the section. This menu changes your guide’s progress reminders, not anything in your game.
Update earned achievements (optional)
Small puffs of gas
Accumulate five minutes of accelerator use during your trips.
Individual tasks and achievements keep their own checkmarks.
Campaign notes & backups
Coverage, version notes and sources
All 54 Steam achievement names are included. Some console lists contain 45 and do not include the full PC set. Tracking is manual and does not read Steam or the game save.
The route covers the campaign, essential upgrades, vehicles and achievement actions. It does not list every poster, decorative toy, tape or loose resource. Illustrated references are linked at difficult searches; they are genuine reference pages, not generated location pictures.
Several obscure counters have inconsistent community reports. Where no reliable exact threshold is established, the guide describes the action and tells you to verify the unlock instead of inventing a number. No claim is made that these routes were playtested on your installed build.
Sources and reference details (59)
Steam: the 54 PC achievements
steamcommunity.com
Reference; evidence type not yet classified
Claim checked: No individual check date recorded. A guide review date is not proof that every claim on this page is current.
Supports: Standard retains survival; Impossible has one life; Free has unlocked construction without plot/tasks. Story relaxes needs but still has lethal hazards.
Claim checked: 2026-10-10
Limits: Official mode announcement does not explicitly say Story disables achievements; no installed-game test was performed.